Sony ILCE-7RM5 Camera Setup for MyShot.ai Service
This guide provides a step-by-step setup process for the Sony ILCE-7RM5 camera to be used with the MyShot.ai service.
1. Camera Preparation
Before configuring your camera, ensure that its firmware is updated to the latest version. Manufacturers continually enhance the camera's capabilities, including improvements in file transfer functionality. To check your firmware version, go to
MENU → [Setup] → [Setup Option] → [Version]
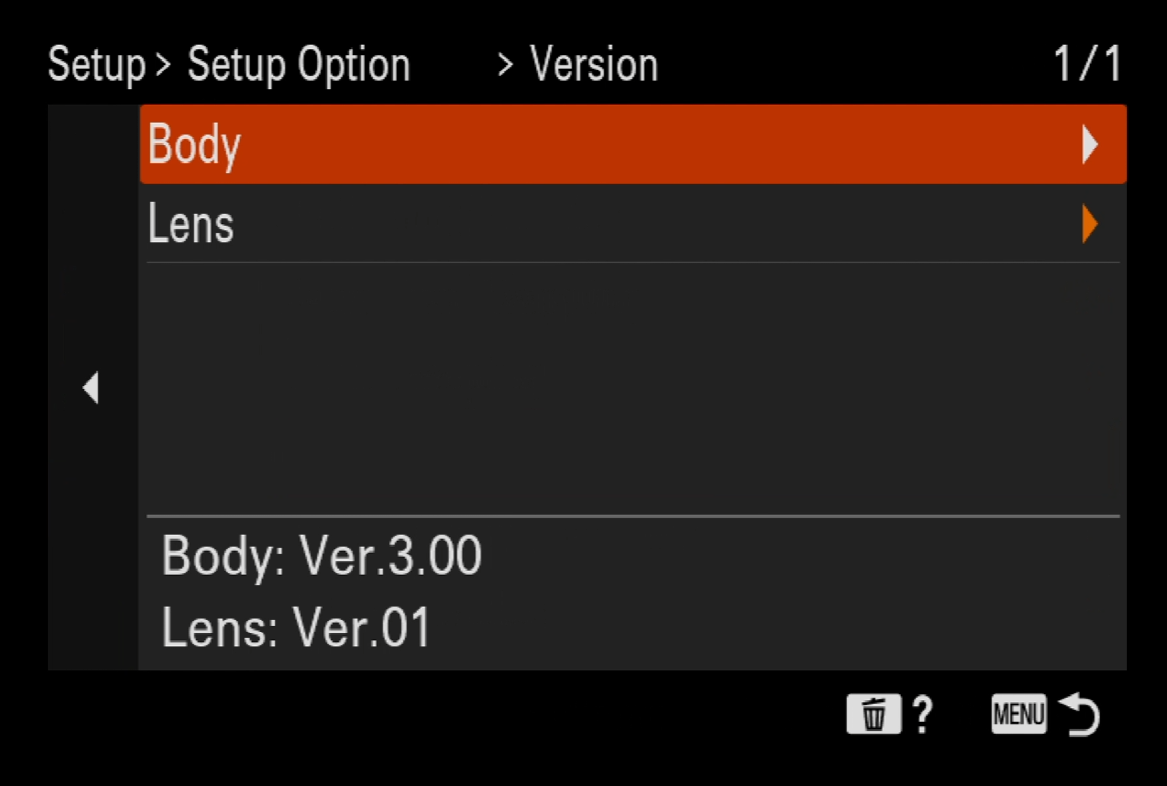
At the time of writing of this instruction (October 10, 2024), the latest firmware version for the camera is 3.0. If your firmware is outdated, we recommend visiting the manufacturer's website to download and install the latest firmware: https://www.sony.com/electronics/support/e-mount-body-ilce-7-series/ilce-7rm5/software/00292267?operating-system=system\_os
2. Setting up Wi-Fi
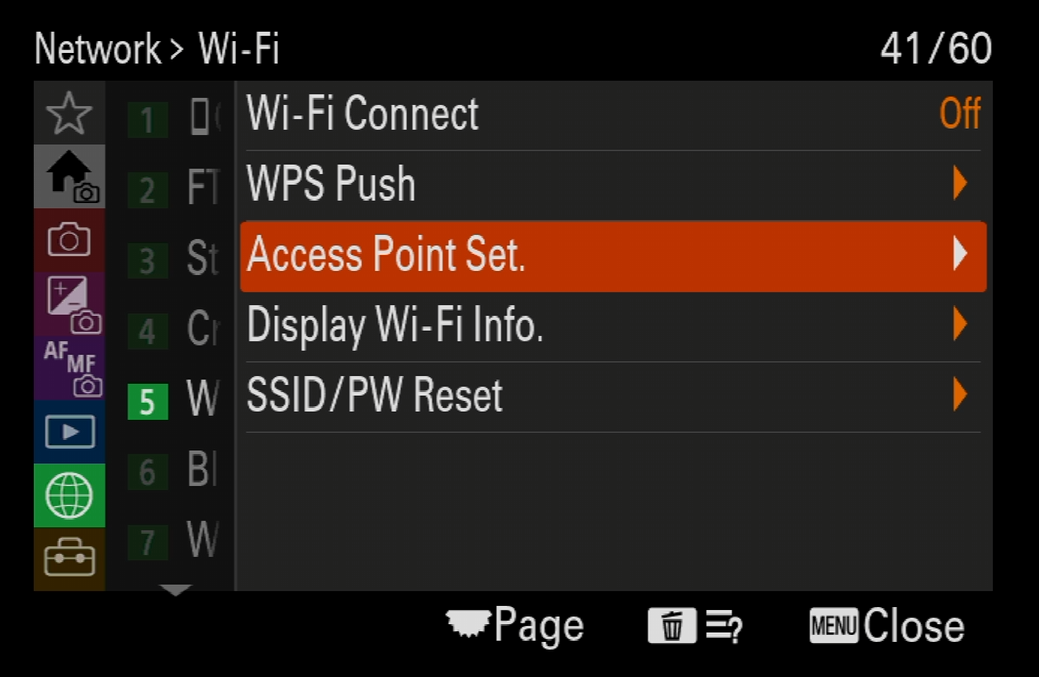
To send photos directly from your camera, you need to connect to a Wi-Fi network. This could be a studio's wireless network or the Wi-Fi hotspot from your phone if shooting on location. To set up Wi-Fi, go to the menu:
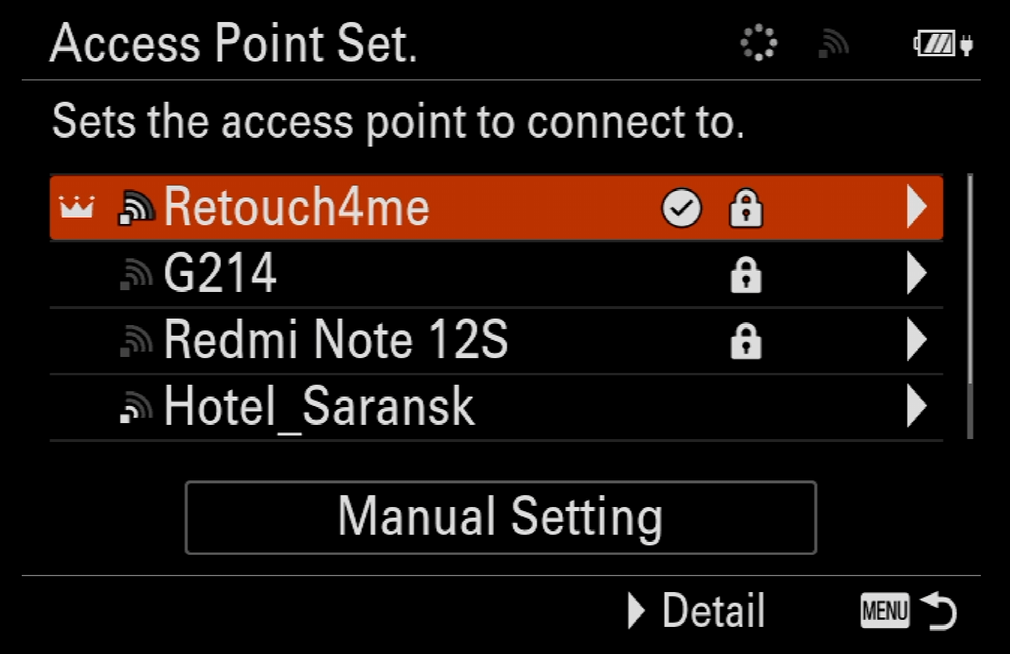
MENU → [Network] → [Wi-Fi] → [Access Point Set.]
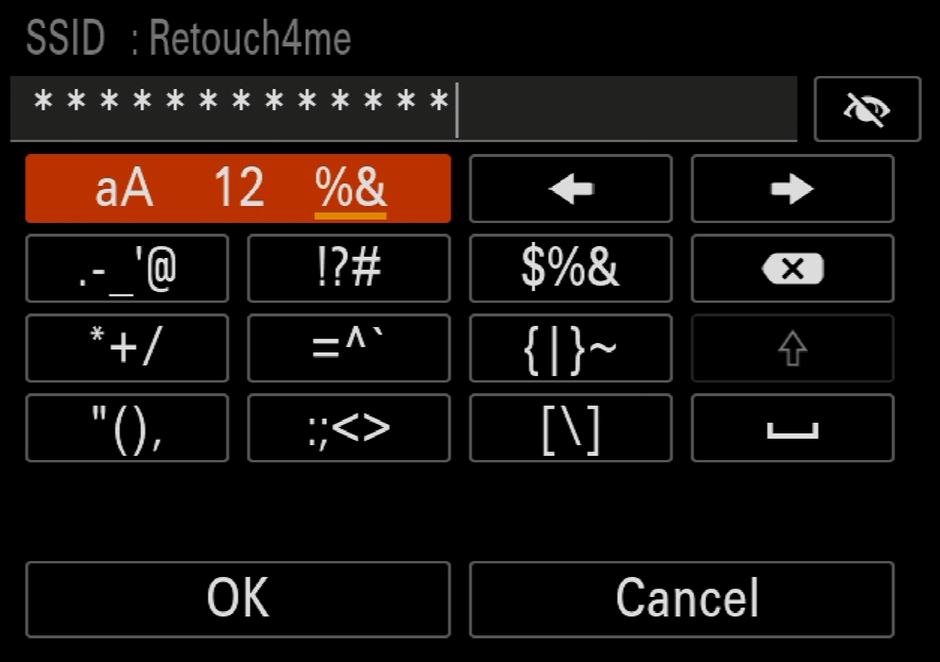
From the list of networks that appear, select the one you want to connect to and enter the password:
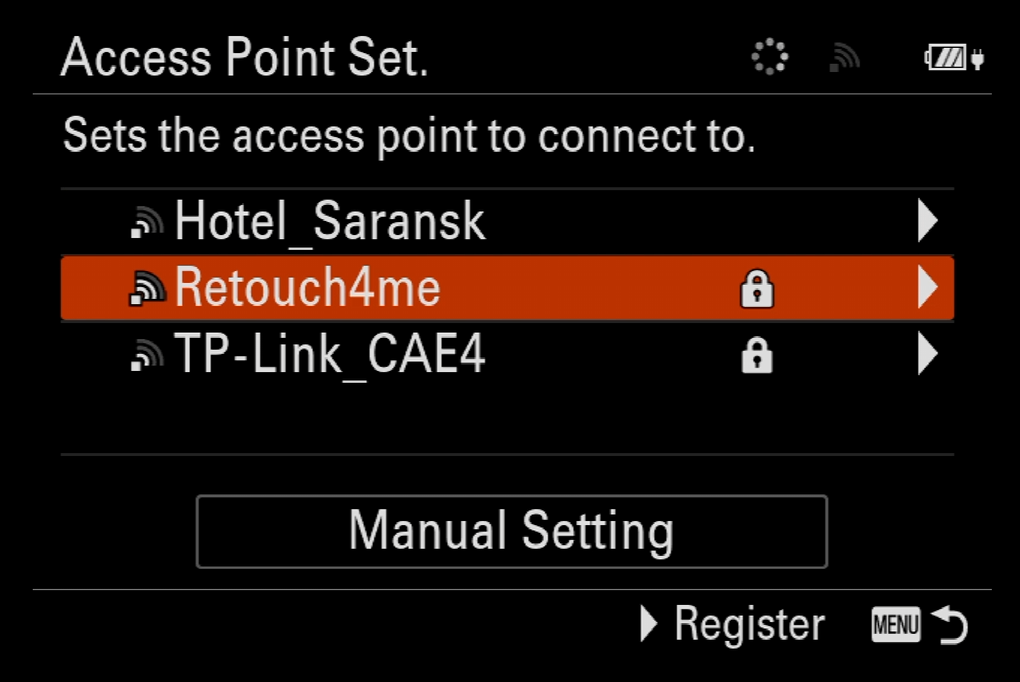
Once successfully connected, you will see a checkmark next to the network name. The "crown" icon indicates that this connection is prioritized.
To enable or disable the Wi-Fi connection in the future, follow these steps:
MENU → [Network] → [Wi-Fi] → [Wi-Fi Connect] → [On/Off]
The camera's Wi-Fi connection setup is complete.
3. Setting up FTP Connection
Photos will be transferred to a remote server via FTP. To set this up, go to the menu:
MENU → [Network] → [FTP Transfer] → [FTP Transfer Func.]
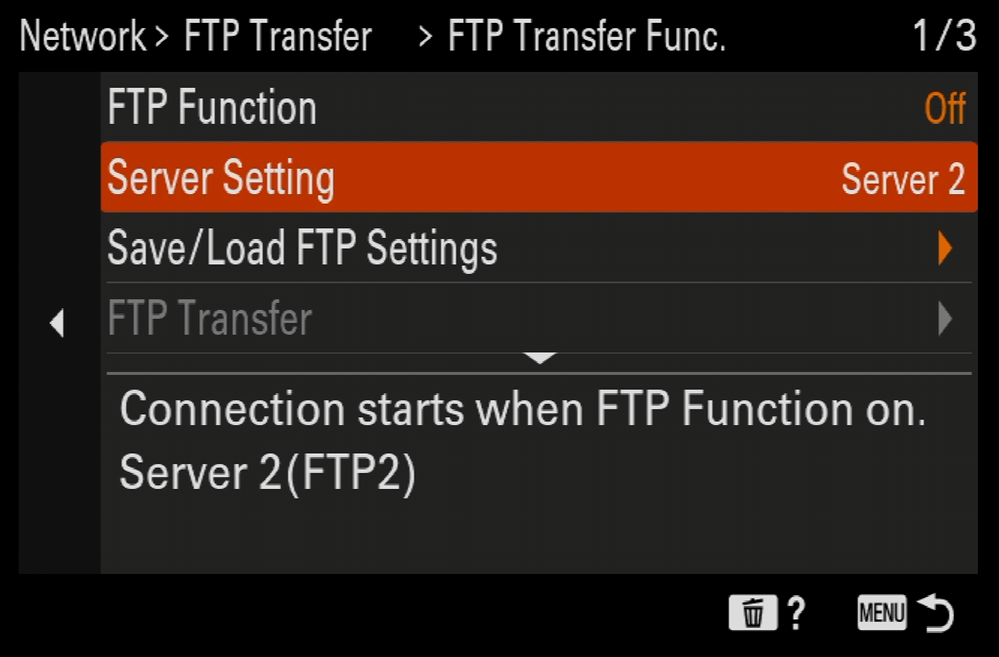
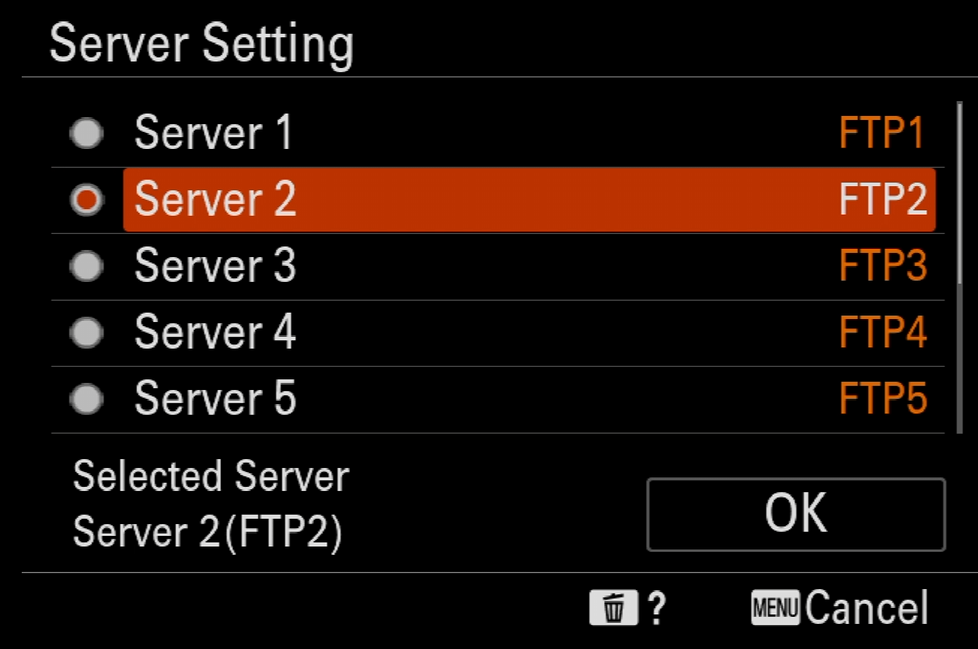
The camera allows you to input settings for 9 FTP servers. Choose any available server. For example, if Server 1 is already in use, select Server 2:
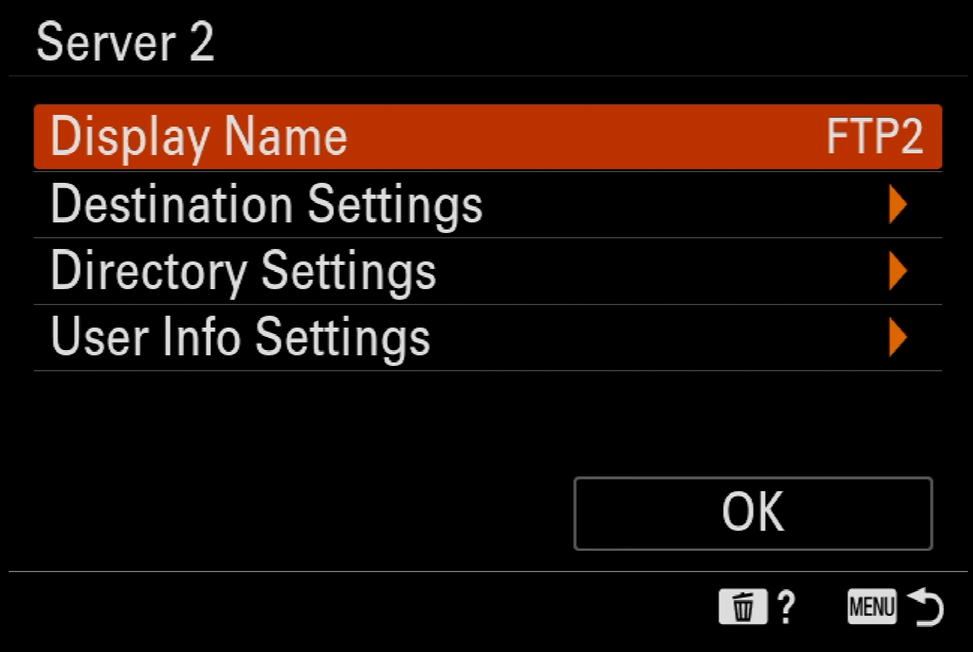
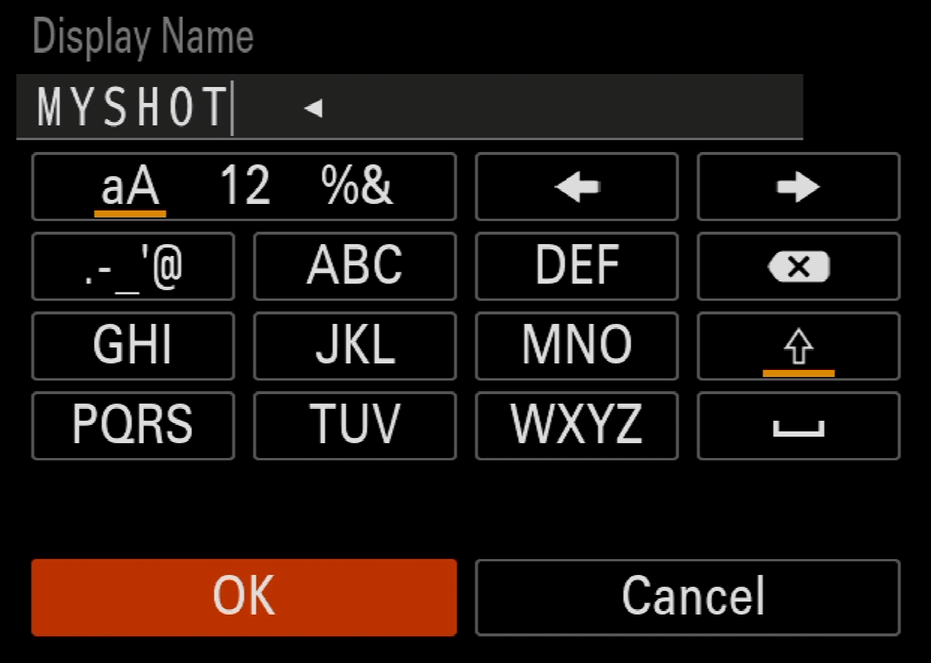
Display Name uses a default server name from the list, which can be changed for convenience, for example, to:
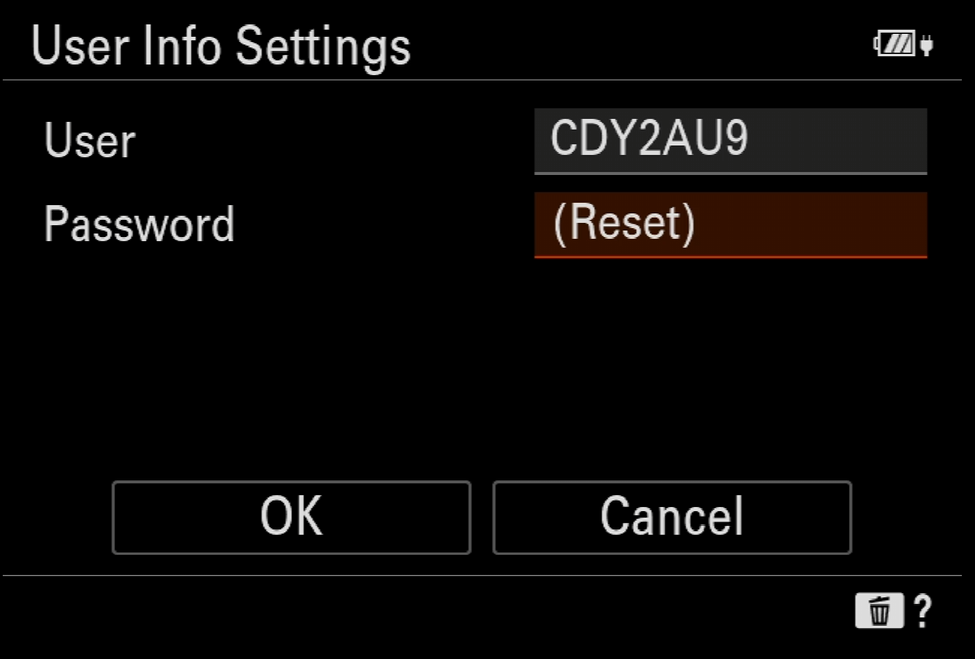
The necessary details for Destination Settings and User Info Settings can be obtained from your MyShot.ai album settings:
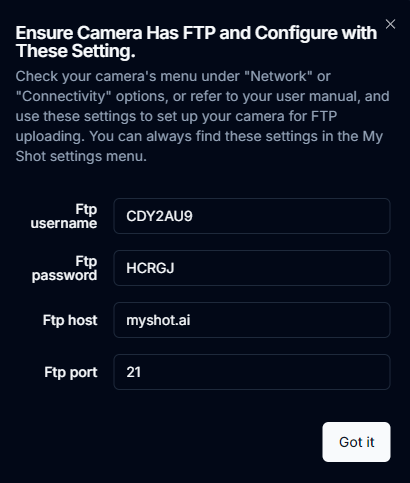
Destination Settings:

User Info Settings:
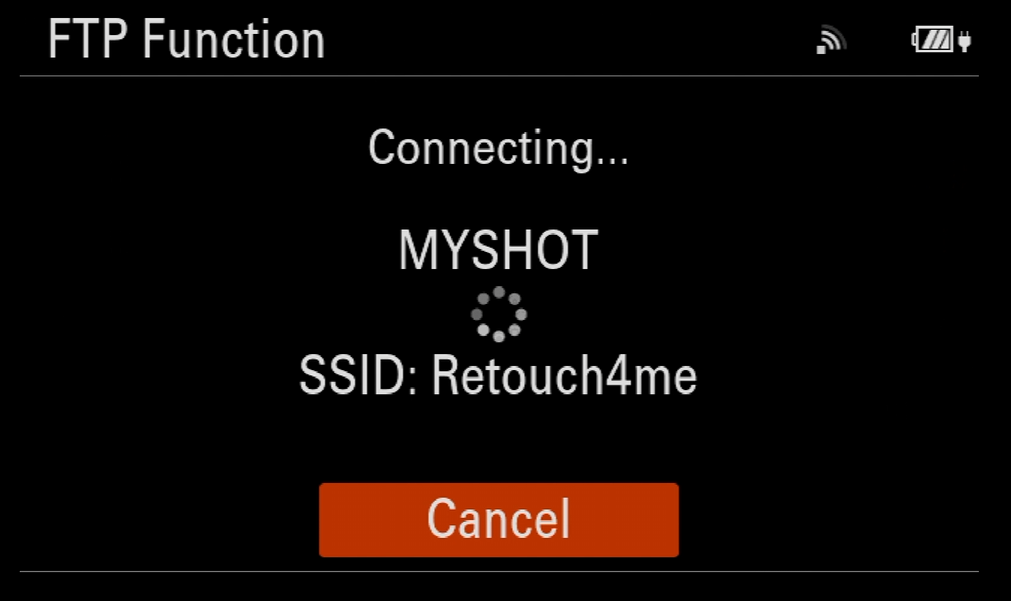
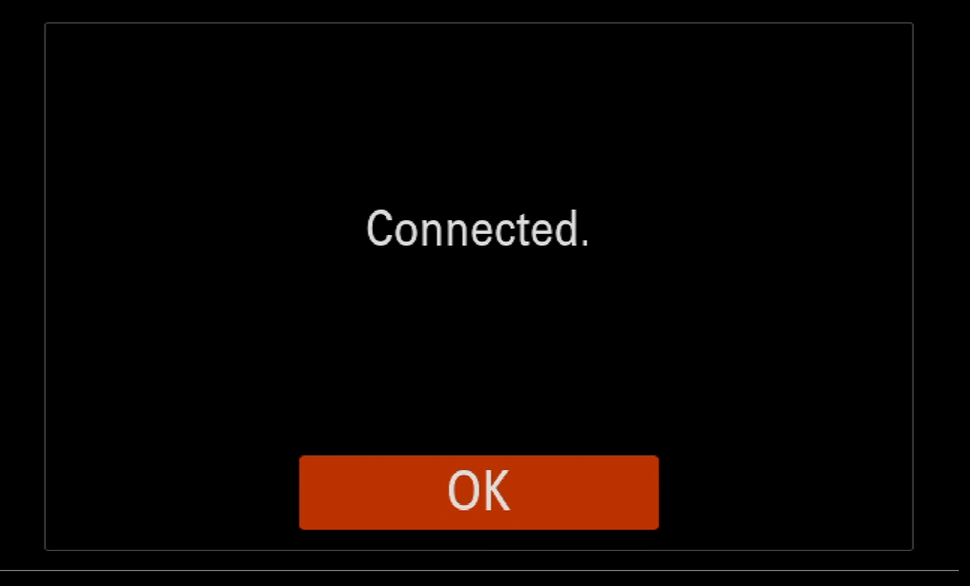
After entering the required information, connect to the FTP server. Ensure the Wi-Fi connection is active. Set FTP Function to 'On':

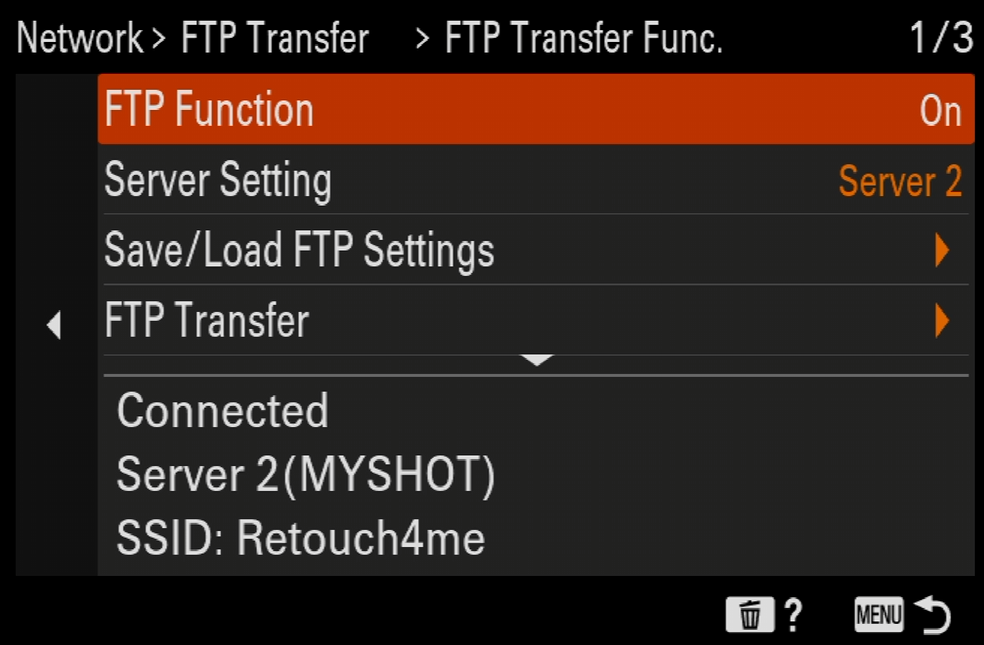
Save/Load FTP Settings - saves and loads FTP server connection settings.
The FTP connection setup is complete.
4. File Transfer via FTP
Let's move on to the advanced settings of FTP Transfer. These settings allow you to filter which photos will be transferred under specific conditions:
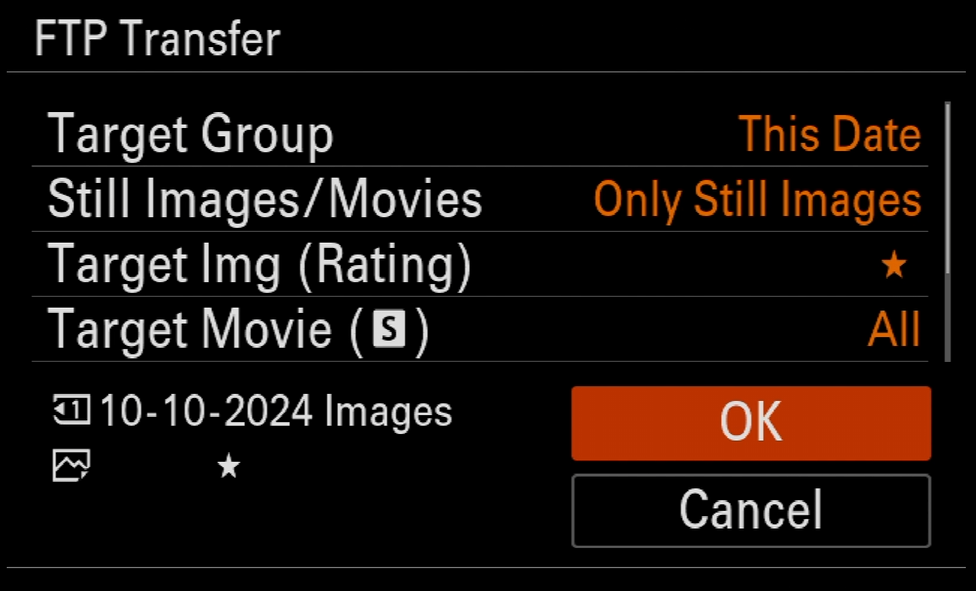
- Target Group: [This Date]/[This Media] — allows you to transfer files from a specific date or a specific file;
- Still Images/Movies: [All]/[Only Still Images]/[Only Movies] — here you can choose to transfer photos and/or videos;
- Target Img (Rating) — transfers photos with a specific rating;
- Target Movie (Shot Mark): [All]/[Only Shot Mark Mov.] — transfers all videos or only those with a Shot Mark;
- Target Img (Protect): [All]/[Only Protected Img.] — transfers all images or only protected ones;
- Transfer Status: [All]/[Only Non-transfer] — displays transfer status.
Now let's go back to the FTP Transfer Func. menu.
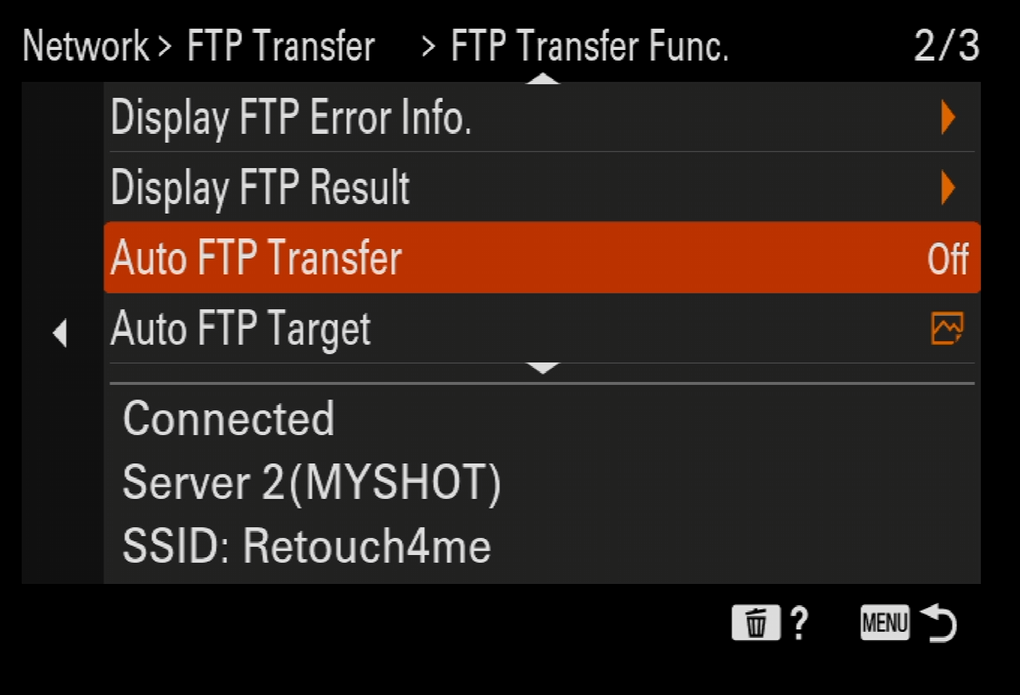
If Auto FTP Transfer is enabled, the camera will send all photos to your album. If the album is public, it's not recommended to use this option during an event, as it's better to filter photos before transferring them.
You can also choose the format and size of the files to be transferred. Select JPEG format. Keep in mind that file size affects transfer speed, especially with high-megapixel cameras.
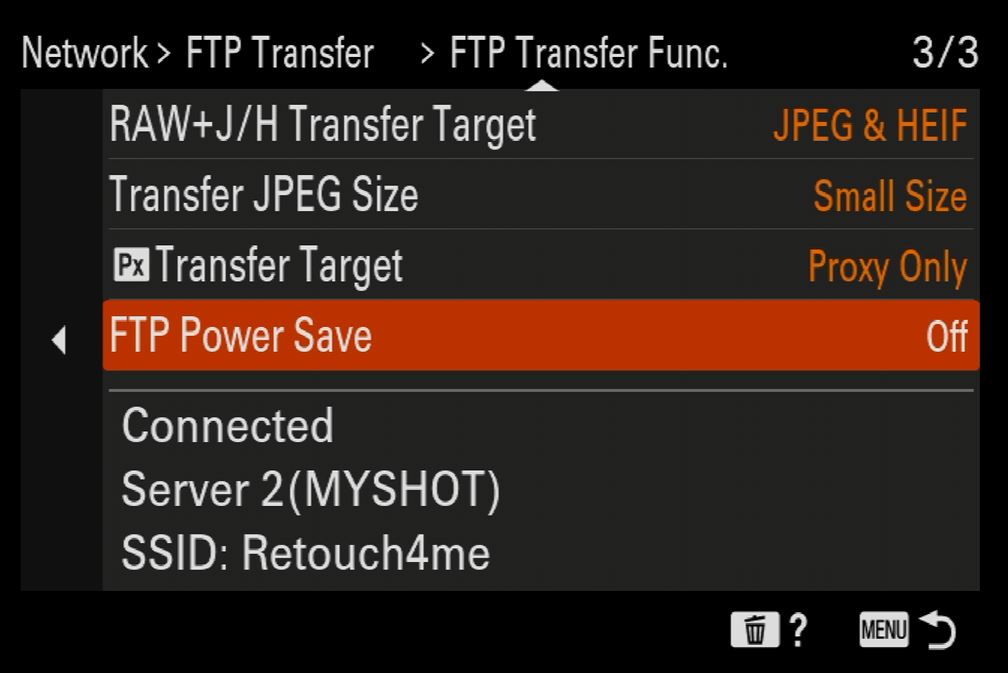
FTP Power Save — if turned off, the camera will not disconnect the FTP connection even if left unused for a long time.
5. Quick Transfer and Rating Setup
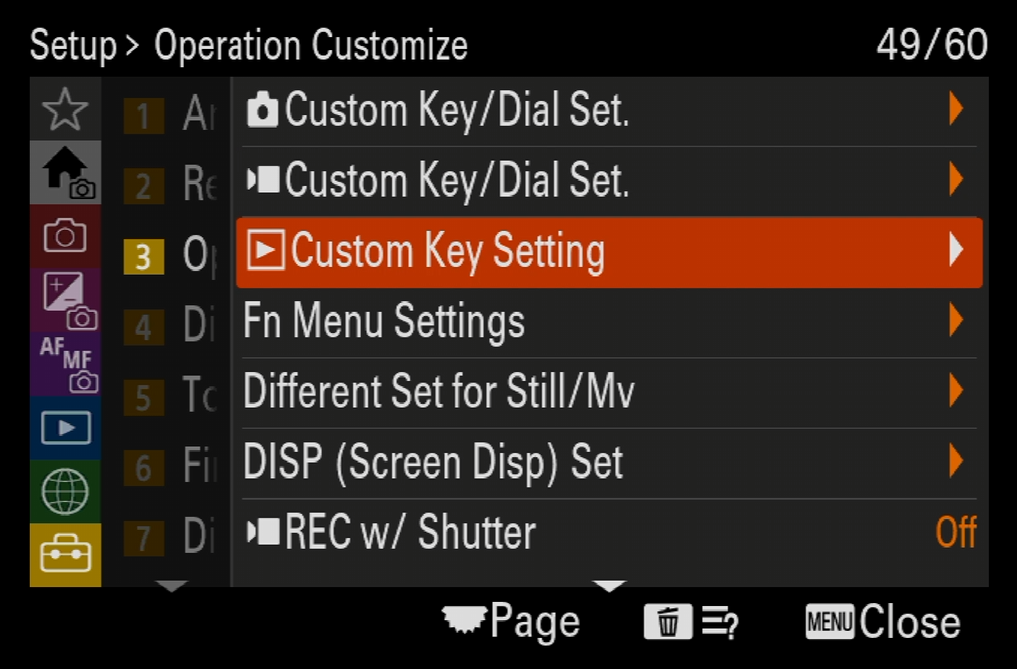
It's convenient to assign hotkeys for quick photo transfer and rating. Depending on the camera mode, you can customize the function buttons. In playback mode, set the buttons as follows:
MENU → [Setup] → [Operation Customize] → [Custom Key Setting]
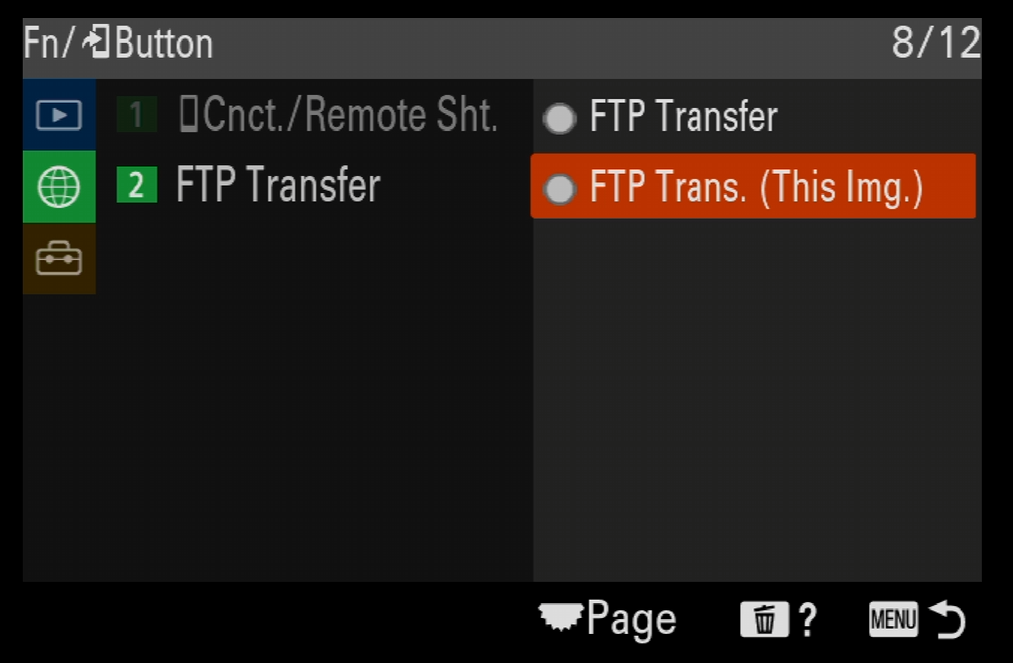
You can reprogram the "Send" button, which by default transfers photos to your phone:
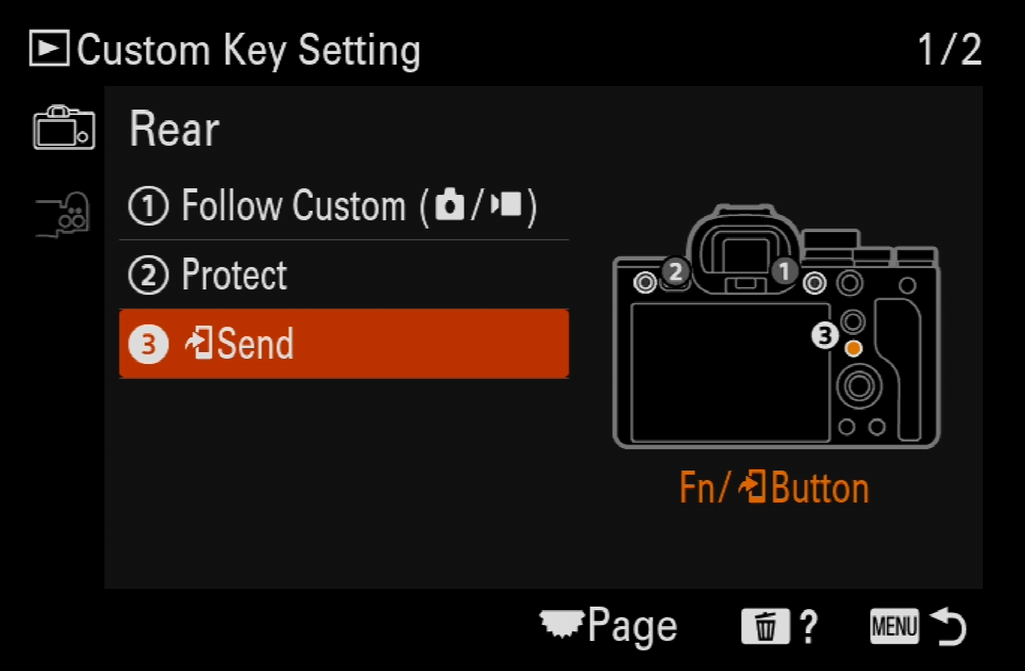
You can assign it to transfer a specific photo via FTP:
Now, in playback mode, simply press this button to send the selected photo to your MyShot album!
To quickly rate photos, assign a hotkey. For example, the video recording button:
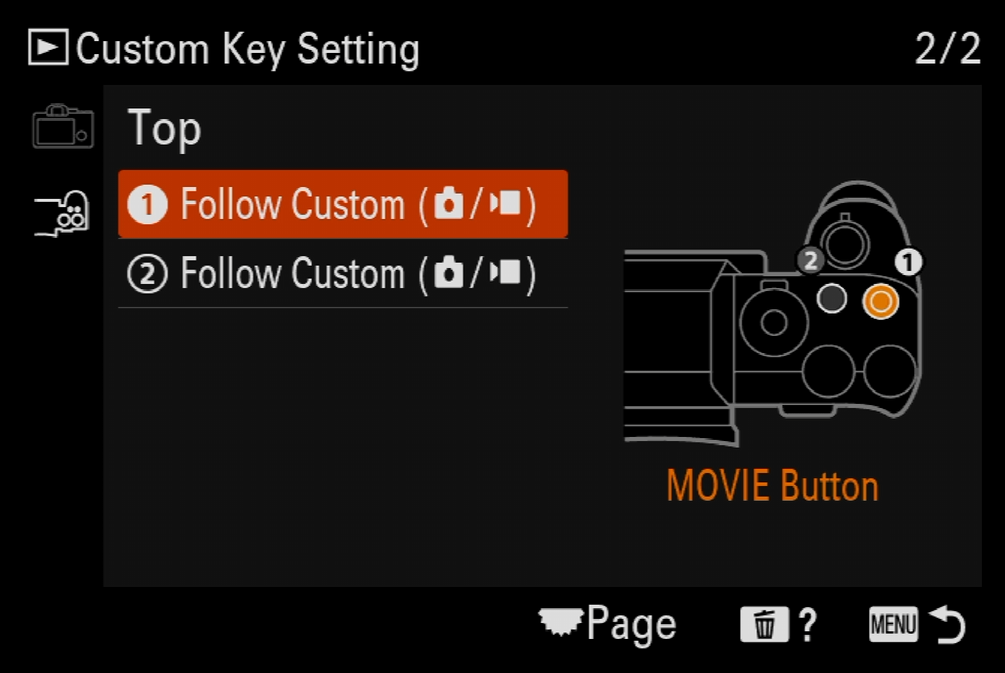
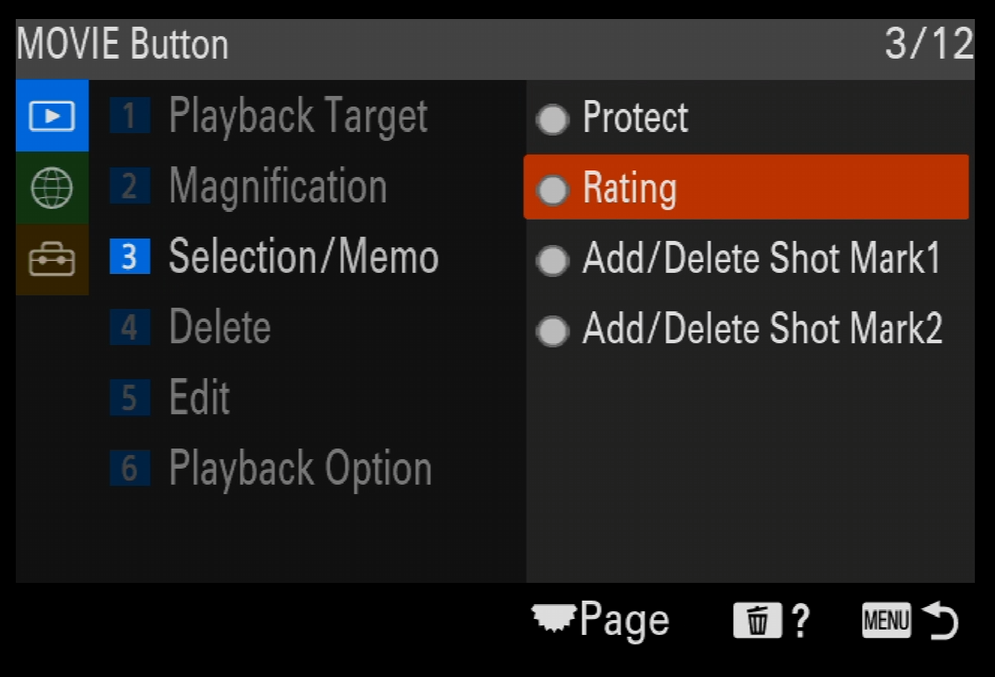
Now, pressing the video button in playback mode will let you rate photos without going into the menu. The rated photos can then be transferred to your MyShot album.